


Please click following link:
- Customer Service (Help us to help you)
Please note that the shipping costs calculated automatically in the webshop may no longer fully reflect the actual shipping rates.
This is due to the significant increase in fuel costs, which DHL applies directly to their pricing.
Unfortunately, it is not easy for us to continuously adjust these rates in the webshop.
As fuel prices fluctuate on a daily or weekly basis, we have chosen not to update the shipping costs constantly.
However, if there is a significant difference between the webshop shipping costs and the actual DHL charges, we may need to charge the difference afterwards.
In such cases, we will send a separate payment request for the additional amount.
Thank you for your understanding.
Used parts:
we no longer supply used parts, unless a used part is listed in the webshop and is in stock.
The prices of used parts have risen in recent years to such an extent that it is no longer attractive for us to buy and sell them.
Used parts can be found on various Facebook forums and Ebay.
New Products
-
Bevel gear set 25:8
 Excl. Tax: €614.10 Incl. Tax: €743.06
 -
Brake lever for foot brake pedal
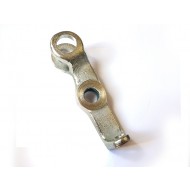 Excl. Tax: €43.65 Incl. Tax: €52.82
 -
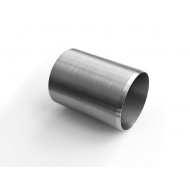
Crankshaft sprocket
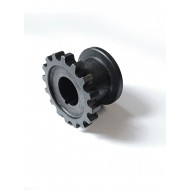 Excl. Tax: €248.65 Incl. Tax: €300.87
 -
Dunlop saddle cover G400
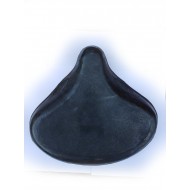 Excl. Tax: €196.50 Incl. Tax: €237.77
-
Float needle - rubber tip, Bing 47-030 (new model)
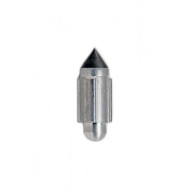 Excl. Tax: €16.20 Incl. Tax: €19.60
 -
Grease cover rear suspension, repair part, R51/3 - R68 ►see details
 Excl. Tax: €19.95 Incl. Tax: €24.14
 -
Metal cover piece in rear fender ►see details!!
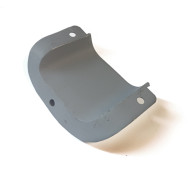 Excl. Tax: €45.00 Incl. Tax: €54.45
 -
Rubber grommet in headlamp
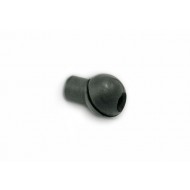 Excl. Tax: €4.15 Incl. Tax: €5.02
